How to Flash TP-Link Archer C8v2 With DD-WRT.
0. DISCLAIMER
I am not responsible for anything. In this tutorial, I described my way of flashing dd-wrt onto this router. You may have different hardware and the methods described here may not work. Please keep in mind that you may end up with bricked device and you agreed with this loss.
1. Case scenario
TP-Link Archer C8v1 and v2 are wireless routers. Even in 2023, it will handle most of the tasks thrown at it by normal home users. However, support for it ended way back in 2016 and no more official updates were released since then [1].
It can be brought back to safer operation with modern updated firmware like dd-wrt.
2. The problem
According to [2] support page on dd-wrt.com site, this device is supported and there is an image for it. Following instructions on [3] flashing this router with dd-wrt is easy. It involves only a few steps. Main one is uploading .bin file via the original TP-Link site. Unfortunately, there are some problems with v2 hardware version which I encountered.
While performing a flash the following errors can be encountered: error -5533 and Error code: 18005. It appears the .bin file on the dd-wrt download page is meant only for the v1 hardware version. Hence the error -5533 appears.
3. Solution
To solve this issue it is suggested to downgrade the firmware with the official release.
This did not help.
Another way that may be tried is to edit the .bin file. It sounds harder than it in reality is. I used GHex program on my Linux machine (Quick install: sudo apt install ghex). Alternatives can be found for other OSs. By opening the downloaded file from [2]: factory-to-ddwrt.bin and scrolling all the way down, the following can be seen:
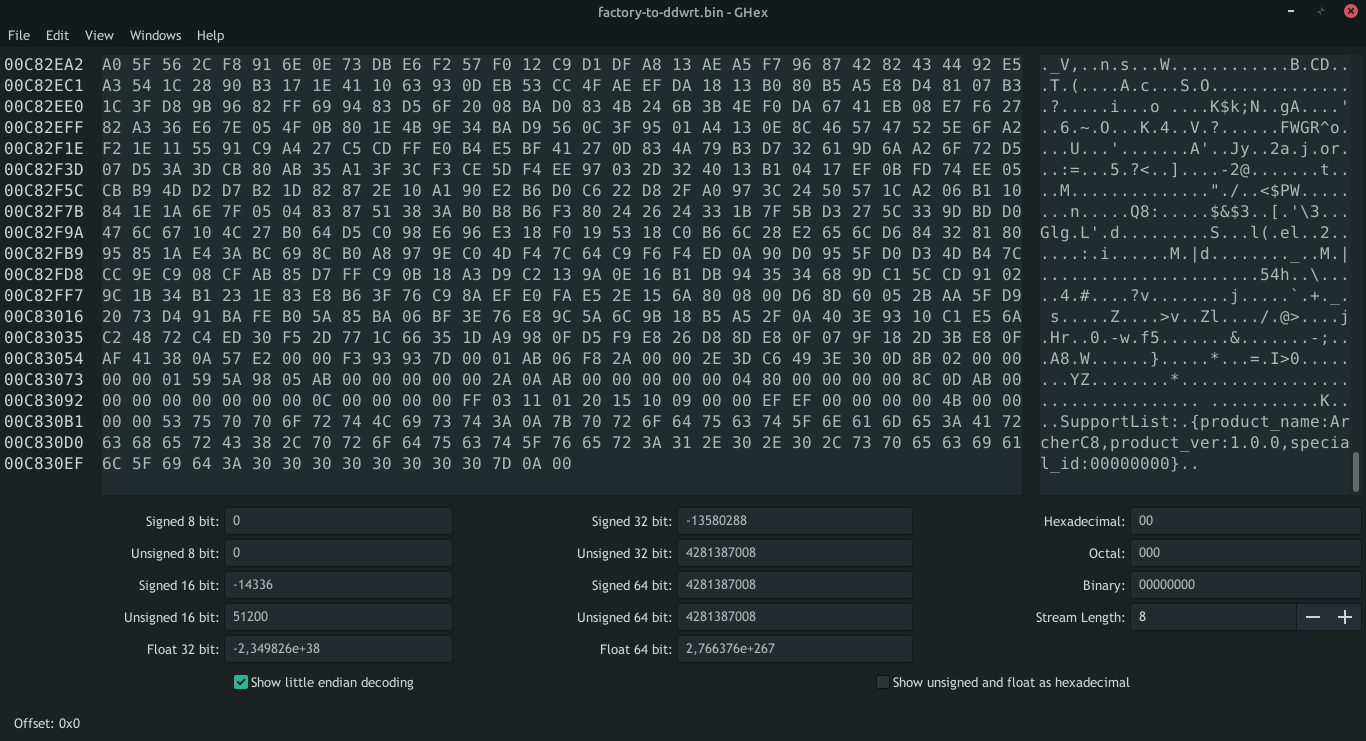
Figure. Original file opened in hex file viewer called GHex.
Change the version from:
product_ver:1.0.0
to:
product_ver:2.0.0
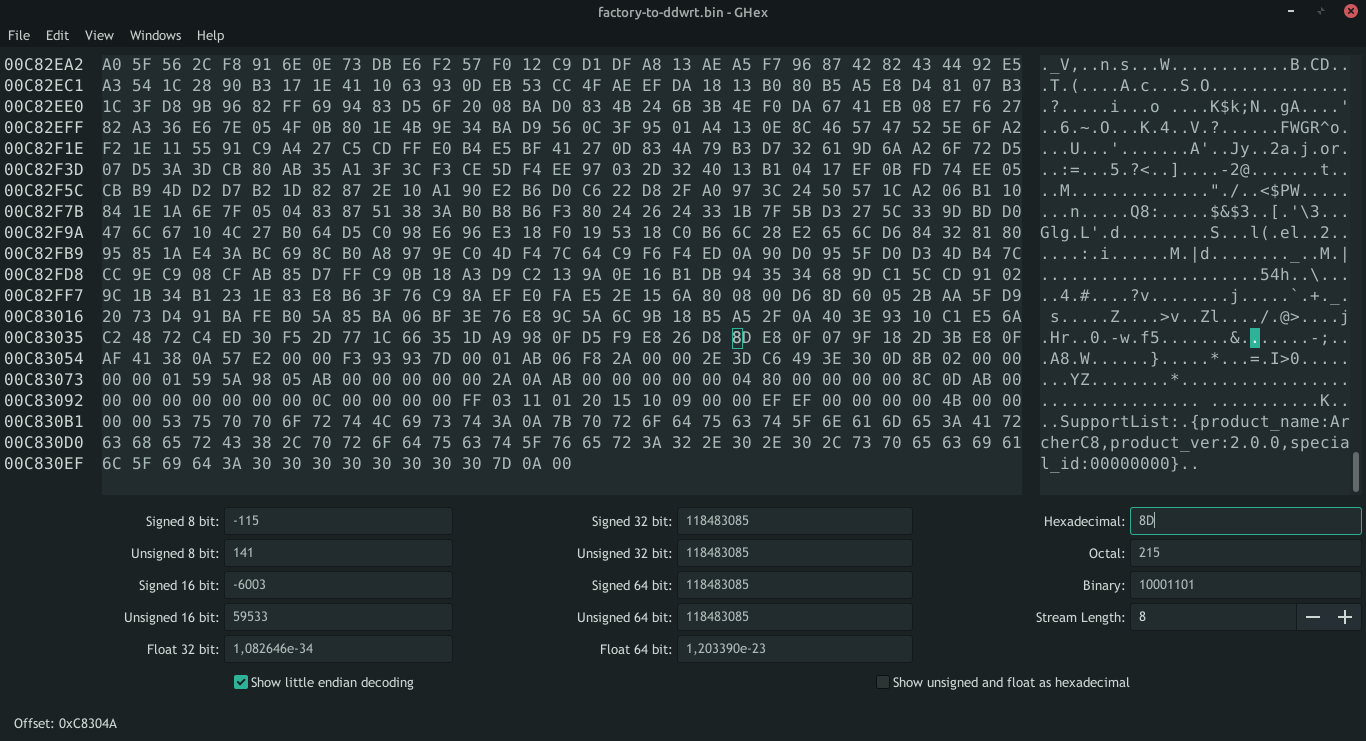
Figure. Changes made to the .bin file.
Don't forget to save the file.
4. Further solution
Unfortunately, the next error which appeared in place of the previous one is Error code: 18005.
For me, at this point [DON’T DO IT] is to rip the case of the router apart, find the serial connector as the photo below presents. Use the TFTP upload method. This, if done properly, should get you up and running.
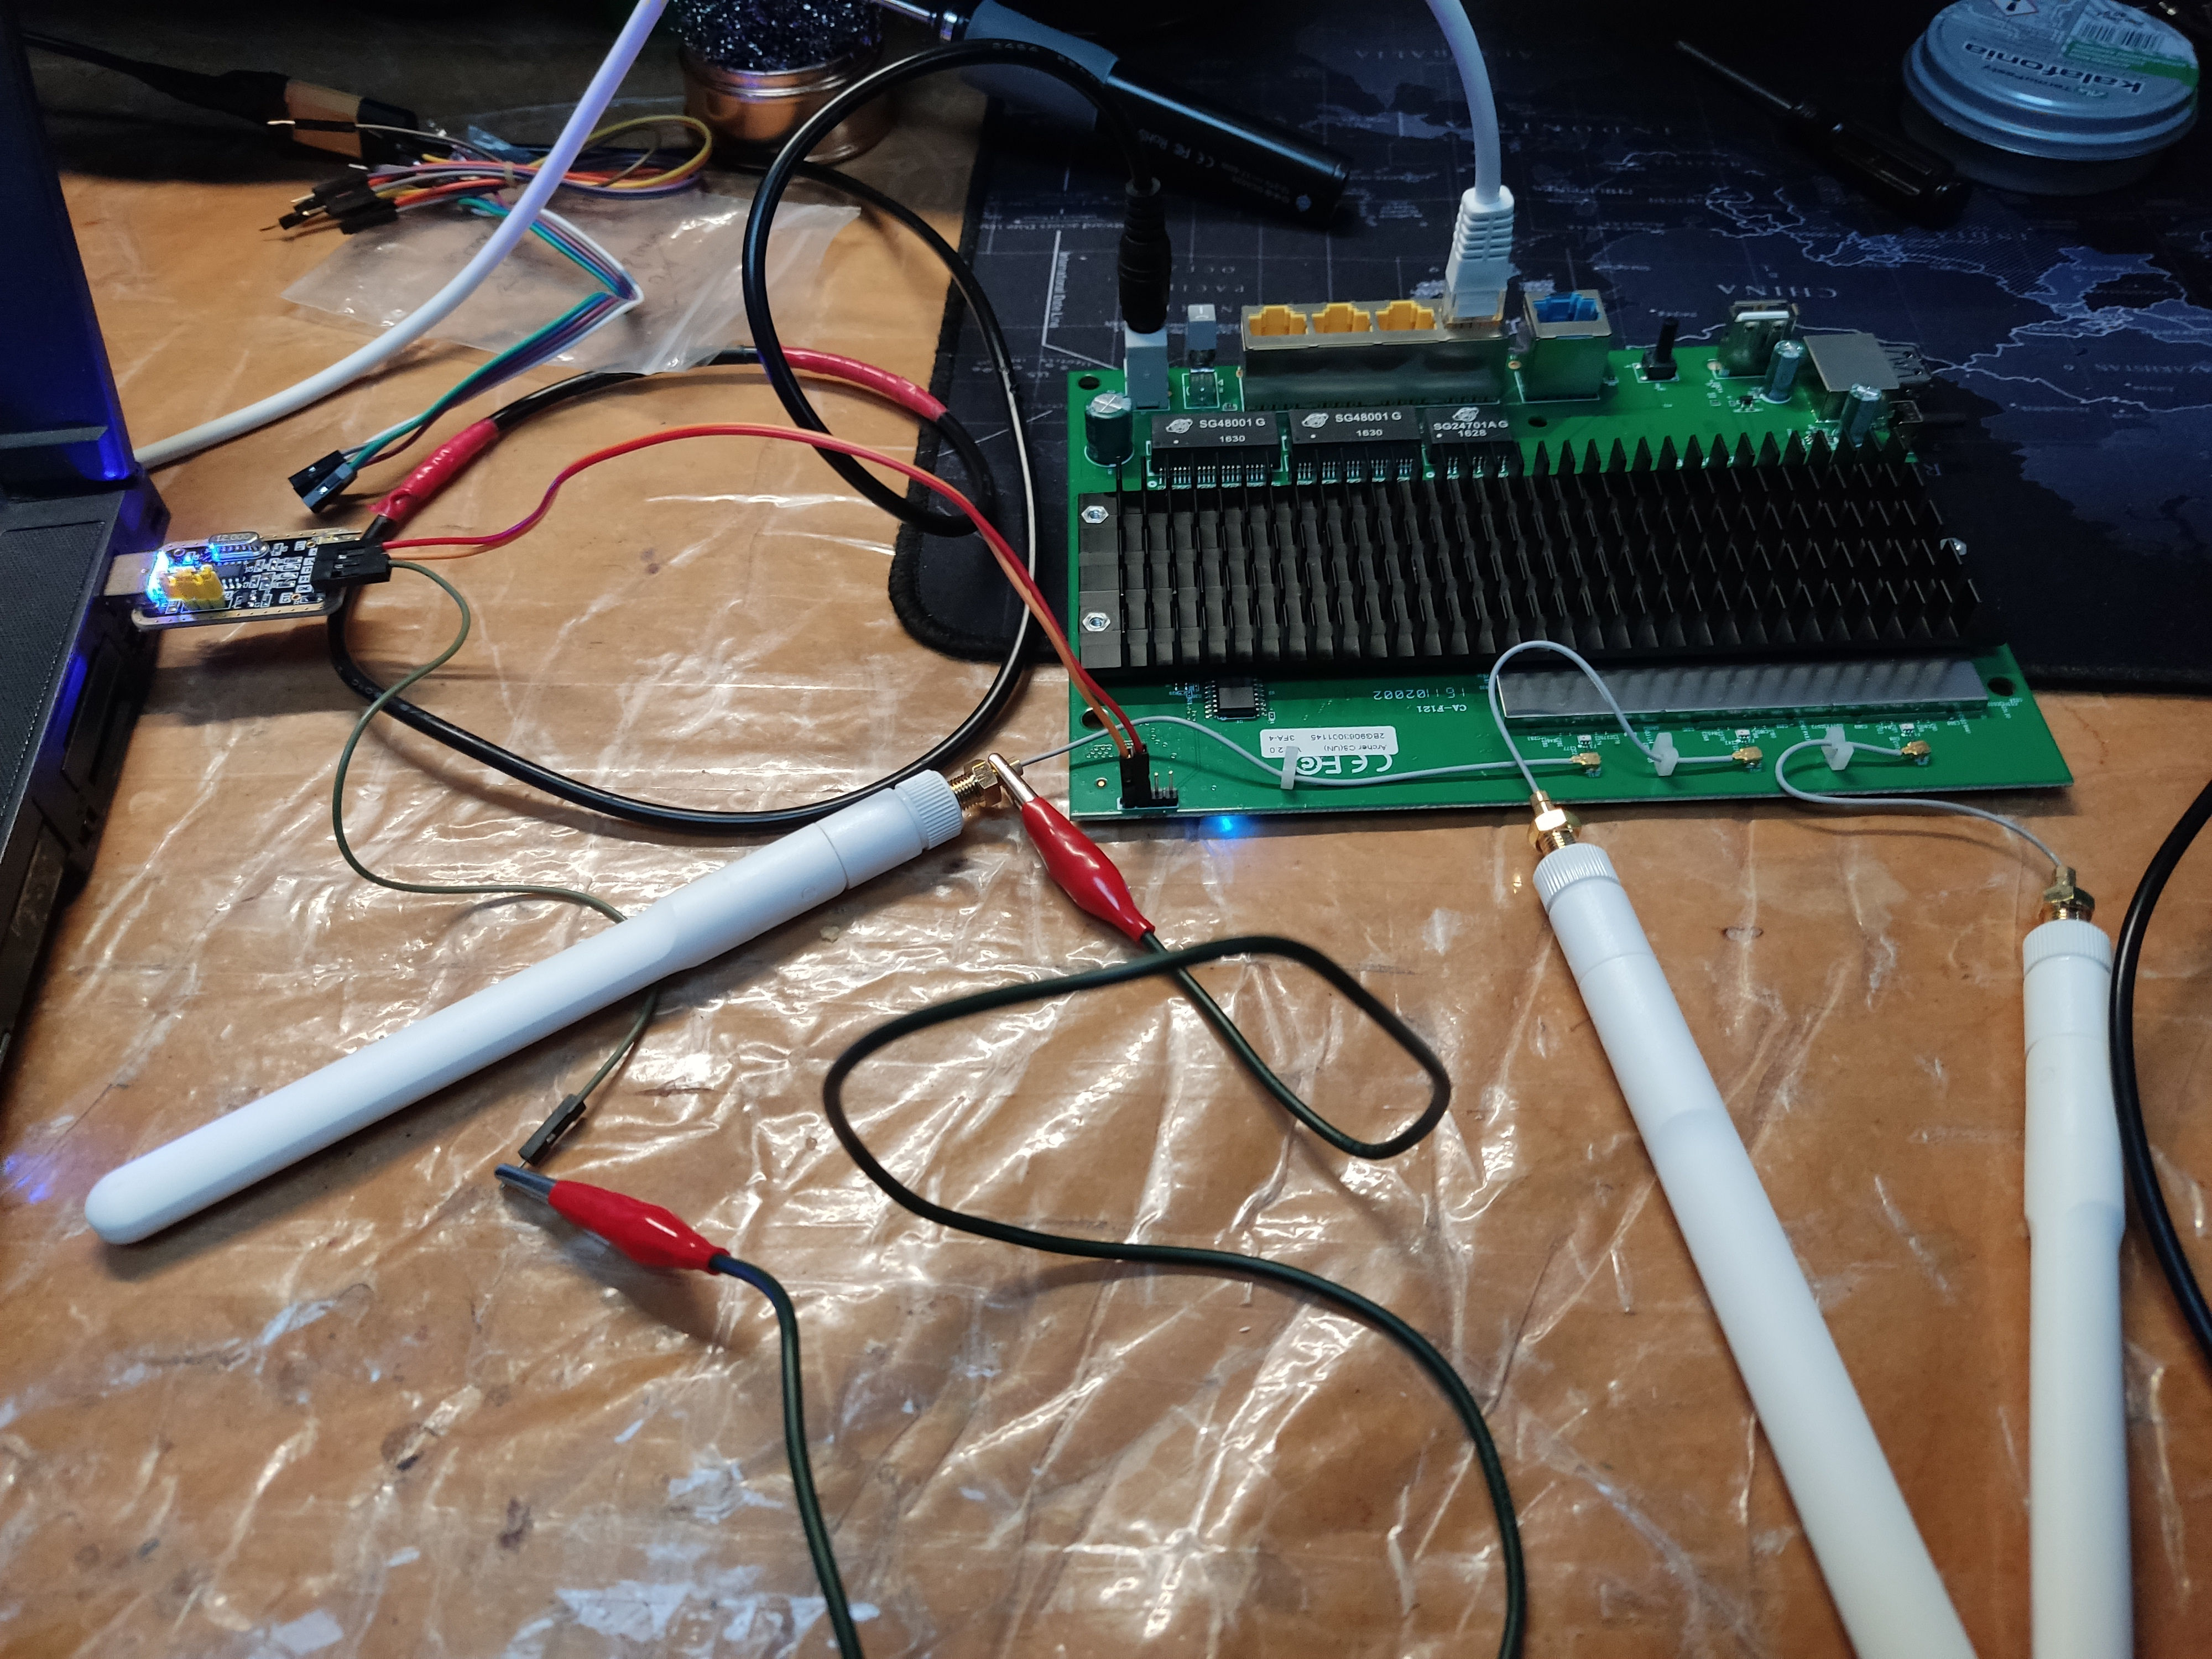
Figure. Setup with the router connected to serial.
What the router expects to get from TFTP server:
1 | Device eth0: hwaddr , ipaddr 192.168.0.86, mask 255.255.255.0 |
Unfortunately, in my case, I bricked to router permanently to this point, at which after a reboot the router did not start up, all lights were gone, no response on the Ethernet connectors and what’s worse no output on the serial.
At this point simple operation became a tough task.
If you have your router still operational and are desperate to get dd-wrt running you may look at
Alternate solutionsat the end of this article first. Below text describes how to de-brick bricked router and may not be required. You can go back to this point and start the de-bricking process from here if theAlternate solutionsdid not work.
As I understand the flash chip layout holding the execution instructions was changed and the router does not know what to start up. To solve this, I figured out which chip is a flash chip, de-soldered it and flashed again using an external programmer. The chip is visible below.
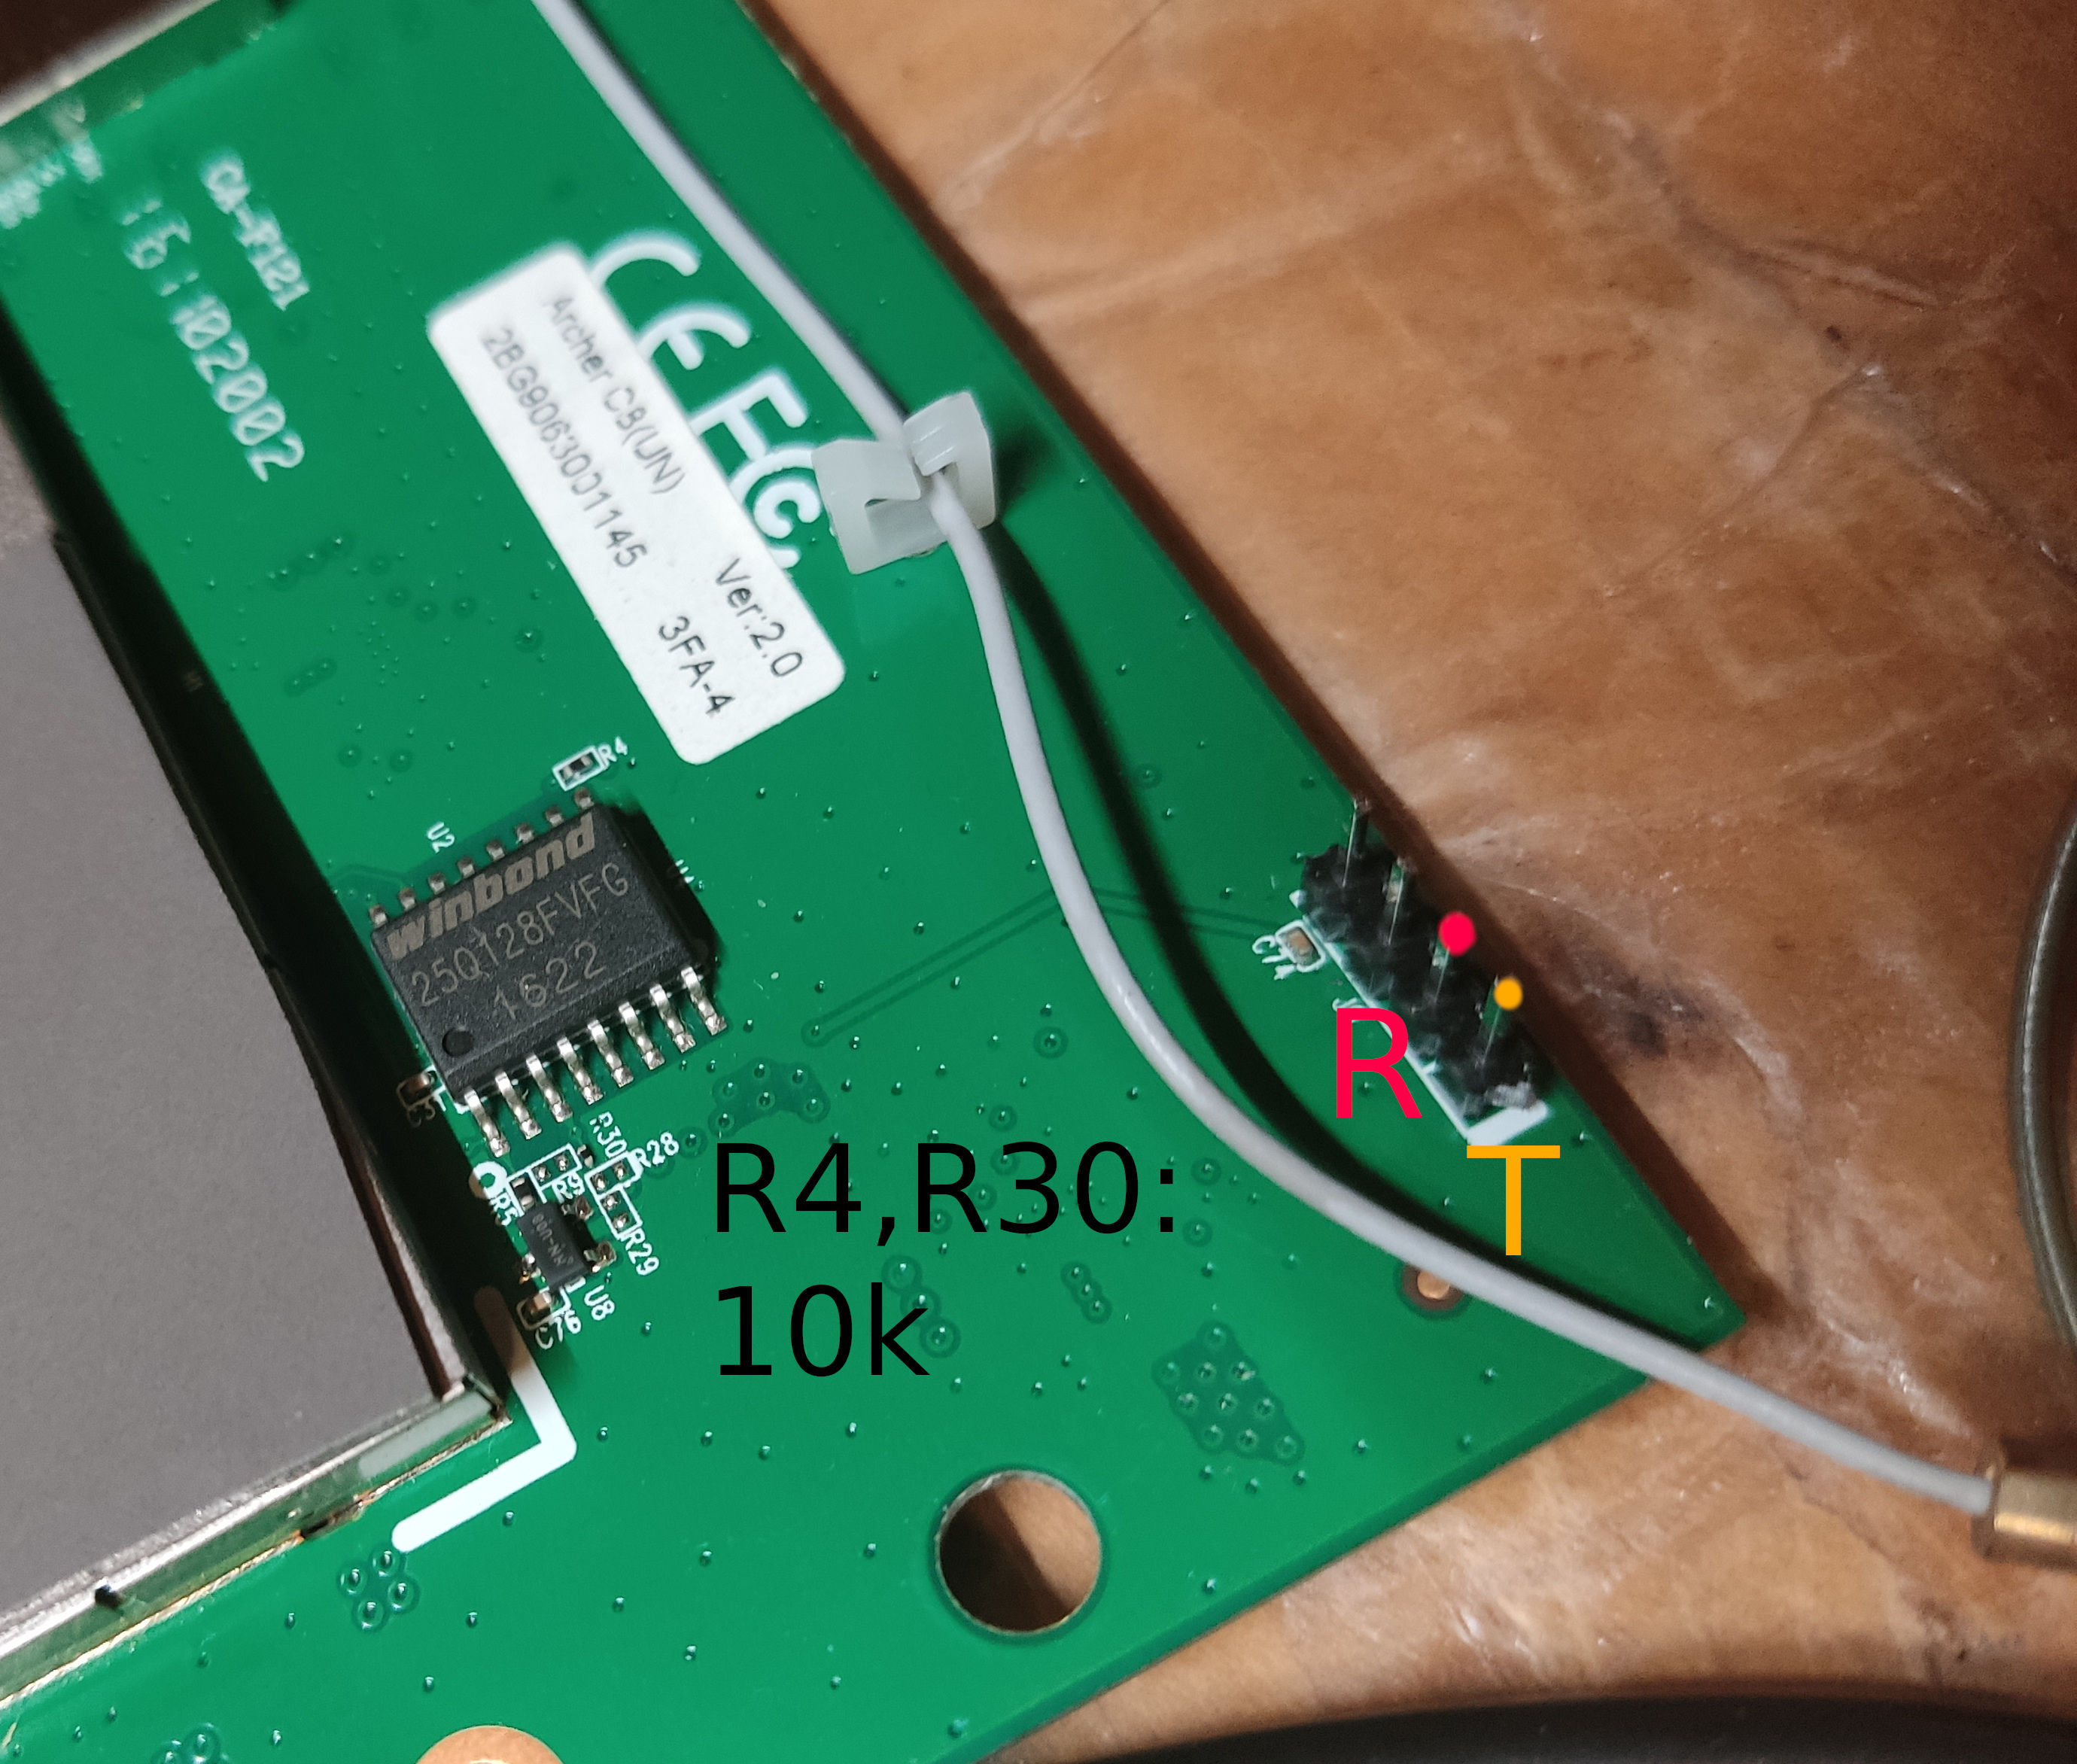
Figure. Router motherboard with flash chip visible. Some resistor values are also indicated, as well as a serial connector. Ground for serial can be borrowed from antenna shielding.
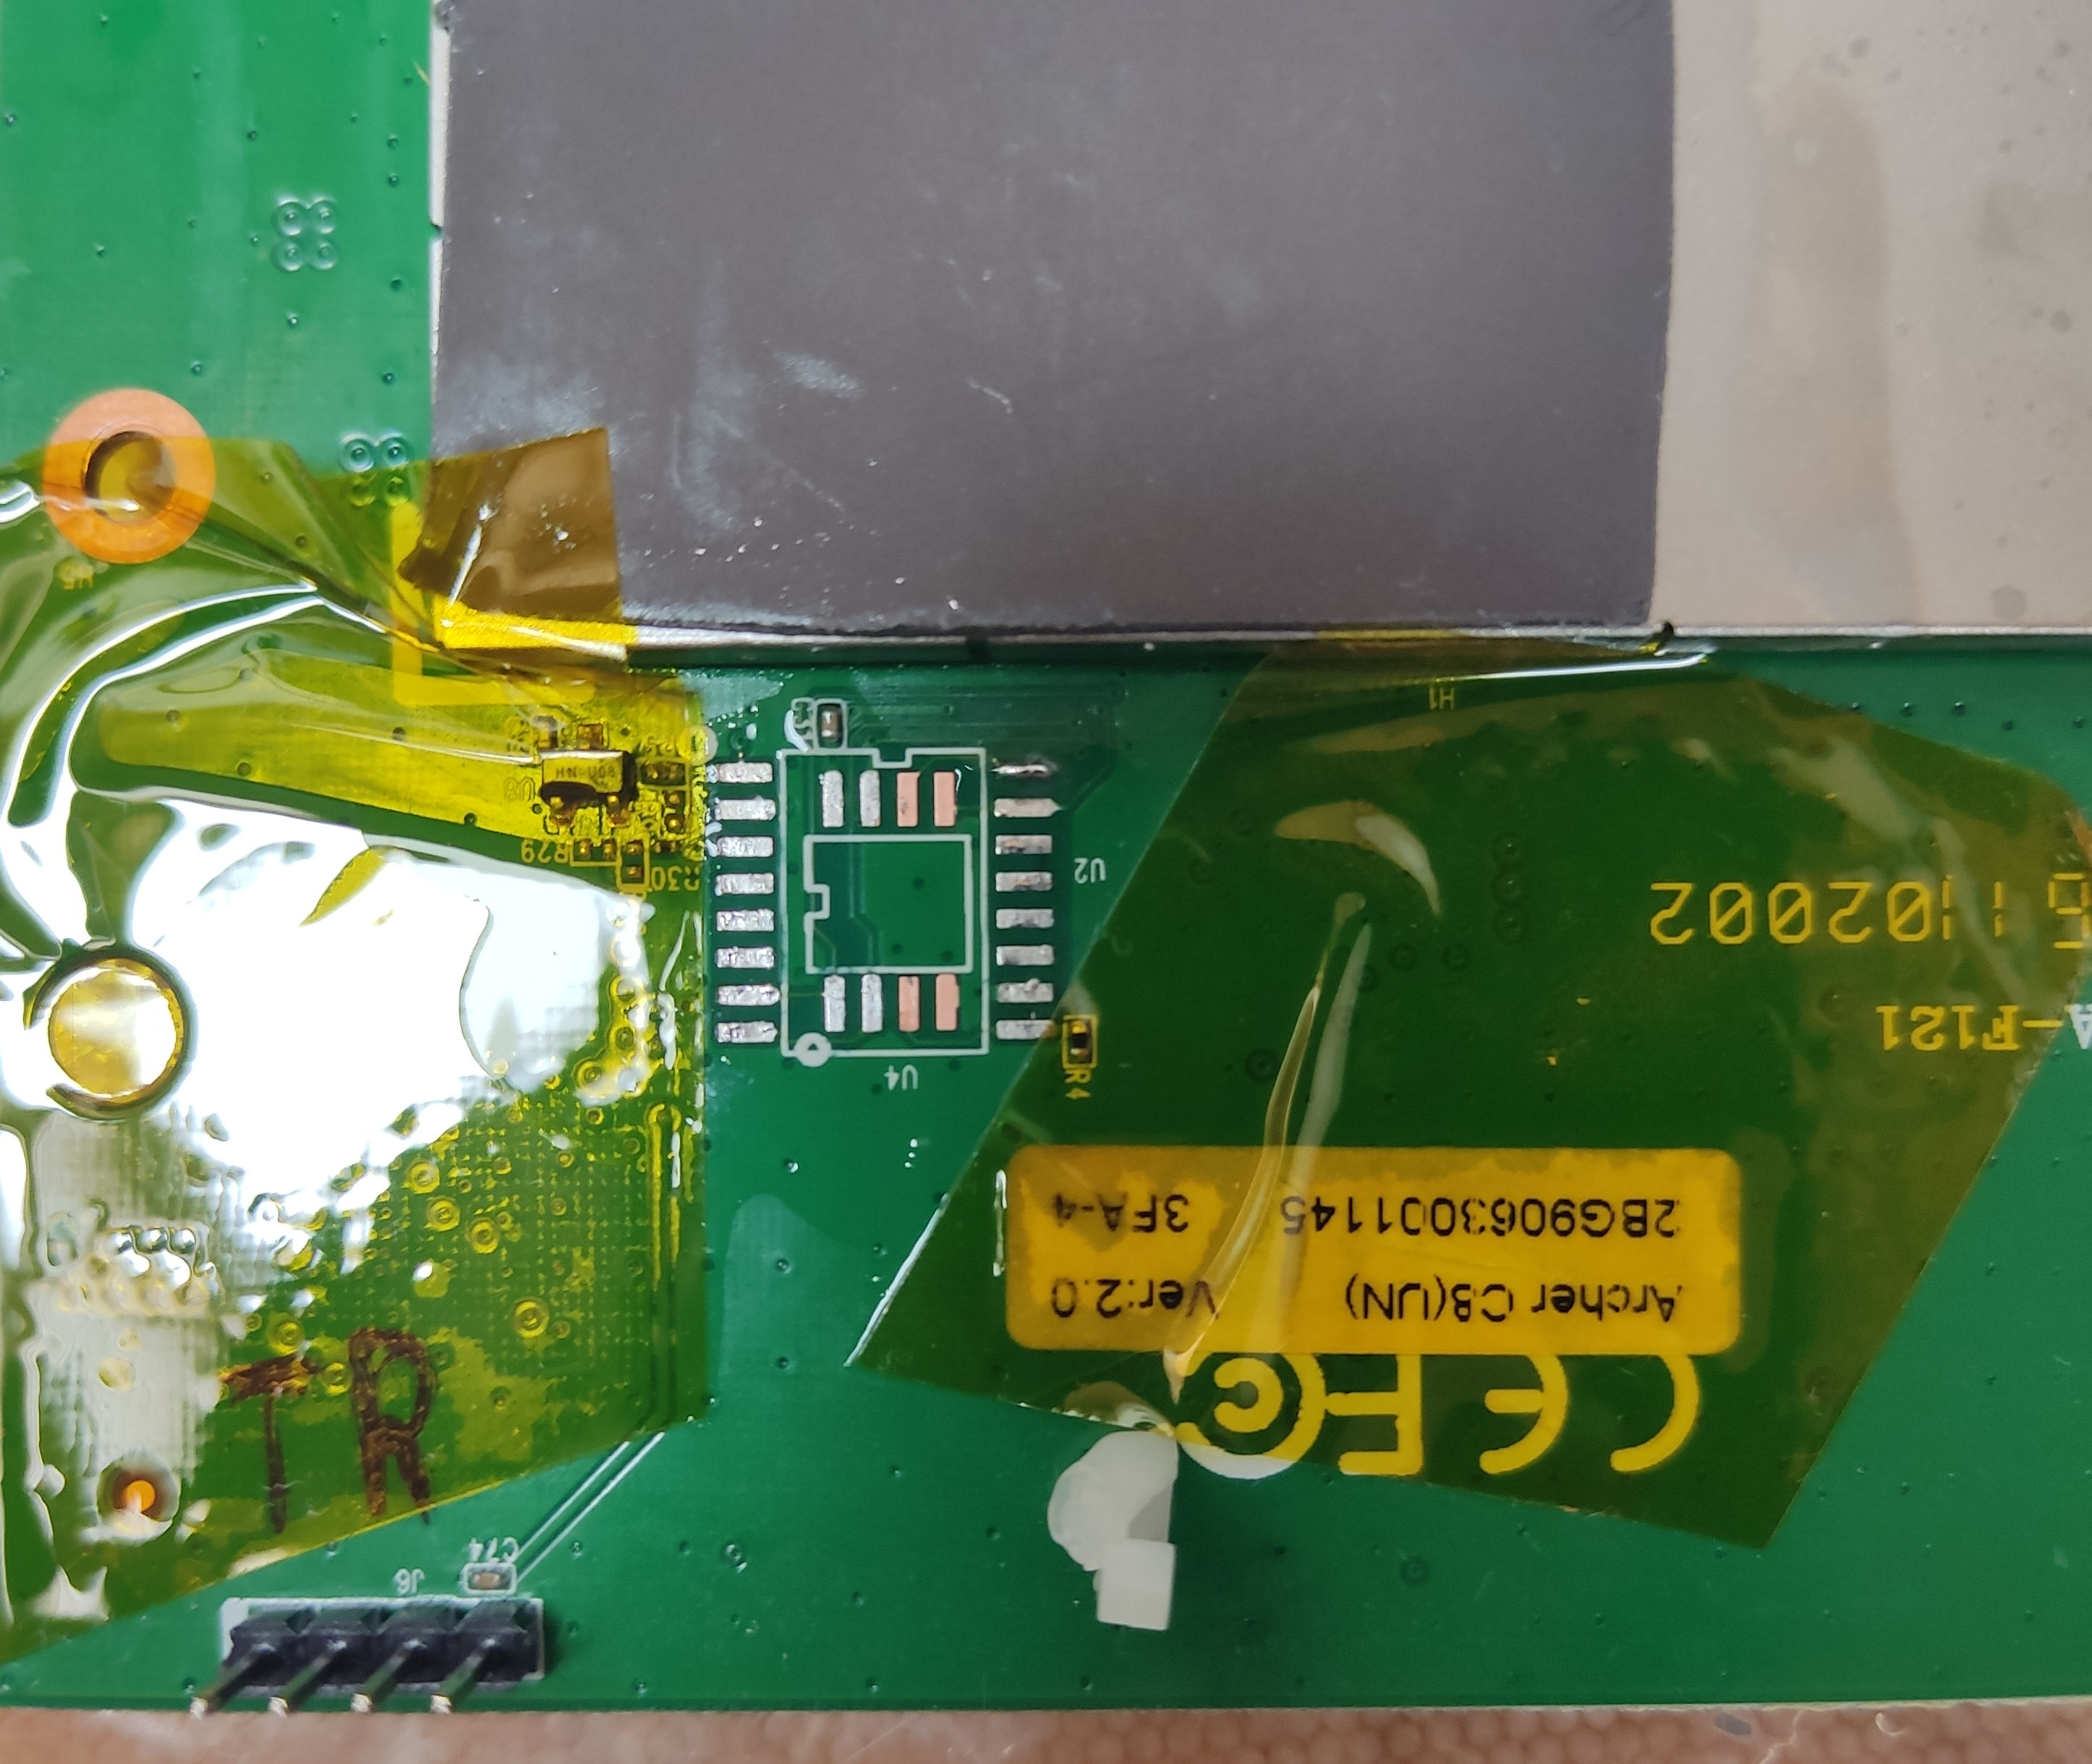
Figure. Photo of the board with removed flash chip. Note kapton tape all around the chip which indicates that I am not that good at hot air de-soldering.
Hints for de-soldering
There are several smaller components around the flash. These are mainly tiny pull-ups or pull-downs resistors for chip pins. I suggest if you don’t have experience with de soldering to cover everything around the chip with kapton tape. Then, use flux and hot air to get the flash chip gently off the board. Programming in place is not an option since by 3V3 voltage rail powering the flash will at the same time power up the rest of the board.
I used the classic CH341a programmer with the appropriate adapter board. Although an adapter is not required since the programmer on the bottom side has the proper pads for this sized flash chip.
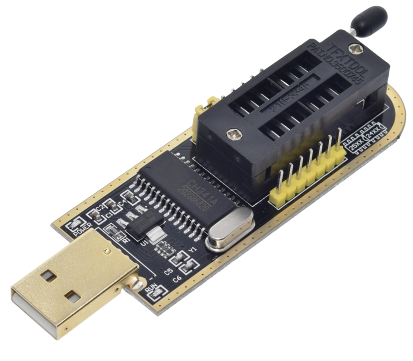
Figure. CH341a programmer used for re-flashing memory chip.
NOTE: watch this video before soldering the flash chip:
https://www.youtube.com/watch?v=HwnzzF645hA
TL;DR is that some pins of this programmer are 5V and some of them are 3V3. This may or may not damage the flash chip. I did the mod and it worked.
To program it I have used flashrom on Linux [4] [5].
First read execute the following command to see if flashrom has detected a programmer and flash attached with the command:
sudo flashrom --programmer ch341a_spi
It should yield:
1 | No EEPROM/flash device found. |
and if the flash chip is properly connected, it should give its name.
Going further, to read the chip contents to see if the programmer is reading the chip and for backup:
sudo flashrom --programmer ch341a_spi -r dump.bin
This should take some time, around 1-2 minutes. After that, you can examine the dump.bin file with GHex.
To fix the flash, we need the working .bin dump. Fortunately for us, this was done by a nice person delhite2 on dd-wrt forum [6]. Both files are attached in my GitHub repo [7] just in case the forum thread disappears.
I flashed the router with v2 dump. But don’t do that (if you have v2). As it appears, it recovers the router to the initial state just fine, but the error codes remain. I have the v2 version and from the pure lack of other options, I flashed v1 dump. It booted and it worked just fine!
What’s more important it let me flash the dd-wrt with GUI just fine. after that, the router had the custom firmware operational like a charm!!!
To flash use the command:
sudo flashrom --programmer ch341a_spi -w dumpv1.bin
It may take a while since the flashrom will read the content first for backup, then write a new image and verify it with the original one. Be patient, if something goes wrong, it will blast you with errors…
Don’t forget to solder flashed chip onto the board :).
5. Alternate solution
I did not test it, but it may happen on the v2 that you can flash the v1 official firmware from TP-Link site using GUI and then flash dd-wrt from that. I did not test it and I don’t know if it will work, but it is worth giving a shot. De-soldering the flash from the board and flashing it with an external programmer is the last resort anyway.
6. Sources
[1] https://www.tp-link.com/pl/support/download/archer-c8/v2/#Firmware
[2] https://dd-wrt.com/support/router-database/?model=Archer%20C8%20(AC1750)_1.x,%202.x
[3] https://wiki.dd-wrt.com/wiki/index.php/TP_Link_Archer_C8#Installation
[4] https://www.flashrom.org/Flashrom
[5] https://manpages.ubuntu.com/manpages/trusty/man8/flashrom.8.html
[6] https://forum.dd-wrt.com/phpBB2/viewtopic.php?t=311049
[7] https://github.com/AlekSmola/WebArchives/tree/main/TP_Link%20ArcherC8v1v2%20Firmware
